Tampilkan postingan dengan label tips trick. Tampilkan semua postingan

Right beside ADS Troubleshooting Comments

My previous creations Place Ads on the right beside the Comments Box, a problem that a friend found the Comment Box will always be under Ad  :r
The fix is ​​as follows:
  • Log into Blogger account with ID friend
  • In the template designer select Edit HTML
  • Check the radio beside Expand Widget Templates
  • Find <p><data:blogCommentMessage/></ p> last 
More like the following code:
<h4 id='comment-post-message'><data:postCommentMsg/></h4>
      <p><data:blogCommentMessage/></p>
      <data:blogTeamBlogMessage/>
      <a expr:href='data:post.commentFormIframeSrc' id='comment-editor-src'/>
      <iframe allowtransparency='true' class='blogger-iframe-colorize blogger-comment-from-post' frameborder='0' height='410' id='comment-editor' name='comment-editor' src='' width='100%'/>
</div>
Please do not be moved or cut it all " on delete "and Paste between the </dl> </div>above </td><td valign='top'> like my previous posts or more as follows:

<span class='deleted-comment'><data:comment.body/></span>
<b:else/>
<p><data:comment.body/></p>
</b:if>
</dd>
<dd class='comment-footer'>
<span class='comment-timestamp'>
<a expr:href='data:comment.url' title='comment permalink'>
<data:comment.timestamp/>
</a>
<b:include data='comment' name='commentDeleteIcon'/>
</span>
</dd>
</b:if>
</b:loop>
</dl>
<h4 id='comment-post-message'><data:postCommentMsg/></h4>
<p><data:blogCommentMessage/></p>
<data:blogTeamBlogMessage/>
<a expr:href='data:post.commentFormIframeSrc' id='comment-editor-src'/>
<iframe allowtransparency='true' class='blogger-iframe-colorize blogger-comment-from-post' frameborder='0' height='410' id='comment-editor' name='comment-editor' src='' width='100%'/>
</div>

</div>
</td><td valign='top'>
<div style='width:210px;height:auto;padding:5px; align:right;border:0px solid #F00;background:#FFF;'>
SAVE SCRIPT ADS / BANNER HERE
<br/>
</div>
</td></tr></table>
</div>
<b:if cond='data:post.commentPagingRequired'>
<span class='paging-control-container'>

Save Template friends, hopefully the issue is resolved :z


2

Place Banner ADS On The Comments Box

Now I will try to share with a friend how to display the Banner or Text Ad Links Blog Comments editor of the boxes above, :r
Here's how:
  • Prepare a script Banner Ad Links already in Parse  »  Here
  • Log into your Blogger account with ID friend
  • Save Template old friend
  • Put a check beside writing Expand Widget Templates
  • Find Code <p><data:blogCommentMessage/></p>  if the template there are 2 friend codes are used the second or above there is code like this:
<h4 id='comment-post-message'><data:postCommentMsg/></h4> 
[SAVE HERE - CODE OF ADVERTISING
<p><data:blogCommentMessage/></p> 
[OR ADVERTISING CODE - SAVE HERE]
If friends want to add more background then the code as follows:
<div style='overflow:hidden;width:485px;padding:10px;border:1px solid #000;-moz-border-radius:5px;-khtml-border-radius: 5px;-webkit-border-radius: 5px;float:center;background:#95CAFF;'>
<h4 id='comment-post-message'><data:postCommentMsg/></h4>
      <p><data:blogCommentMessage/></p>
      <data:blogTeamBlogMessage/>
EXAMPLES IN THE ADVERTISING SCRIPT
&lt;center&gt;&lt;script type=&quot;text/javascript&quot;&gt;&lt;!--
document.write(&#39;&lt;s&#39;+&#39;cript type=&quot;text/javascript&quot; src=&quot;http://www.ppcindo.com/show.php?z=44&amp;pl=39572&amp;shape=1&amp;j=1&amp;code=&#39;+new Date().getTime()+&#39;&quot;&gt;&lt;/s&#39;+&#39;cript&gt;&#39;);
// --&gt;&lt;/script&gt;
&lt;noscript&gt;
&lt;iframe src=&quot;http://www.ppcindo.com/show.php?z=44&amp;pl=39572&amp;shape=1&quot; width=&quot;460&quot; height=&quot;68&quot; marginwidth=&quot;0&quot; marginheight=&quot;0&quot; hspace=&quot;0&quot; vspace=&quot;0&quot; frameborder=&quot;0&quot; scrolling=&quot;no&quot;&gt;&lt;/iframe&gt;
&lt;/noscript&gt;&lt;/center&gt;
</div>
  • The result is like this:

  • Comrade can create Banner Ads Sponsor put above or below or above Post Comments and Post Editor Comments :D
  • So is the columns can be removed or relocated
  • Save the template friend 

0

How To Make Tab Menu Floating Spoiler


Now I will share with a friend how to make the Tab Menu Floating Spoiler Tab Menu Spoiler because it has its own advantages
Demonya to see  » Here
The advantages that I mean do not need to click, just point the mouse friend there will kebuka own Spoiler, Okey's go to »

How to make :
  • Login to ID fellow Blogger Account
  • In select Edit HTML Template Designer
  • Search for ]]></ b: skin>
  • Copy and paste the following css code and put it before ]]></ b: skin>
    #bmenu{
    position:fixed;
    left:5px;
    top:5px;
    background-color:#236C95;
    border-radius:10px;
    -moz-border-radius:10px;
    border:1px solid #FFF;
    width:202px;
    height:20px;
    color:#FF0;
    transition:all .5s ease-in;-moz-transition:all .5s ease-in;-webkit-transition:all .5s ease-in;-o-transition:all .5s ease-in;z-index:3;overflow:hidden;padding:9px 15px 10px;}
    #bmenu h3{
    margin:0;
    padding:0;
    text-align:center;
    cursor:pointer;}
    #bmenu ul{
    border-radius:10px;-moz-border-radius:10px;
    border:2px solid #FF0;
    background-color:#95CAFF;
    margin:15px 0;
    padding:0 15px;}
    #bmenu li{list-style:none;margin:0 0 5px;padding:0;} #bmenu li a{
    color:#00F;
    text-decoration:none;
    font-size:14px;}
    #bmenu li a:hover{
    color:#F00;}
    #bmenu:hover{
    z-index:5;
    height:175px;
    Text in red is the viewing position, please change the red text is to move the zoom position [eg upper-left, right and down and so forth].
    Text in blue is the background color to the outside with yellow font color and so on
    • If it fits the template save comrades
    • Back in the Template Designer
    • Select the Add a Gadget [+] in JavaScript / HTML
    • Copy and paste the following HTML code into it
      <div id="bmenu"><h3>  FLOATING MENU TAB </h3>
      <ul><li><a href="http://blog-renovasi.blogspot.com/p/siapa-saya.html" title="My Profil" target="_blank">MY PROFIL</a></li>
      <li><a href="http://blog-renovasi.blogspot.com/p/kontak-kami.html" title="My Contact" target="_blank">CONTACT US</a></li>
      <li><a href="http://www.facebook.com/?ref=home/" target="_blank" title="Facebook Putu Blogbego">FACEBOOK</a></li>
      </ul></div>
      Note:
      1. Please replace the URL with the URL of my friends,
      2. Save Template friends and see the results
      3. If it looks less fit for a friend, please reset the settings on Css was stored above ]]></ b: skin> 
      4. If everything is just right do not forget to save it back Templates friend 

      0

      HOW TO MAKE WRITING RUNS IN SIDEBAR

      Previously I've shared with friends, How to Create a Title Bar Maker whose presence in the Tab Bar Blog :# now I will share with a friend how to make paper that can be placed on Walking Gadget / Sidebar. :r


      Here's how:
      • Log into Blogger account with ID friend 
      • In the Template Designer select add Gadget
      • In the HTML / JavaScript select sign (+) 
      • Copas (copy paste) the following script into it 
      <script language="JavaScript">
      var max=0;
      function textlist()
      {
      max=textlist.arguments.length; for (i=0; i<max; i++) this[i]=textlist.arguments[i];
      }
      tl=new textlist
      (
      "SHARE WITH PRIDE AN IF WE CAN HELP MY FRIEND ....!!! " // Geben Sie hier den zu scrollenden Text ein
      );
      var x=0; pos=0;
      var l=tl[0].length;
      function textticker()
      {
      document.tickform.tickfield.value=tl[x].substring(0,pos)+"_";
      if(pos++==l)
      {
      pos=0;
      setTimeout("textticker()",1000);
      x++;
      if(x==max)
      x=0;
      l=tl[x].length;
      } else
      setTimeout("textticker()",100);
      }
      // end -->
      </script>
      <script language="JavaScript">
      <!--
      document.write("<FORM NAME=\"tickform\">");
      document.write("<INPUT TYPE=\"TEXT\" NAME=\"tickfield\" SIZE=\"90\">"); // Bei SIZE können Sie die Größe des Feldes ändern
      document.write("</FORM>");
      textticker();
      //--></script></div></div>

      • Change the color red in accordance with the tastes of friends
      • Figures 90 blue tailored to the length of the sentence / article that a friend made
      • Posts will appear from left to right as we're writing
      • Free from term placement writing adapted to a wide place to put it

      0

      how to create Menu without the Edit HTML Tab


      Many ways and models of Tab Menu created by seniors Blogger, just try looking for friends in the search box, just select how they want that is available. :r
      But here I will try to share with a friend how to make the Tab Menu is the most easy to apply to blog friend, because it does not need to touch the HTML template simply by adding gadgets The trick as follows :
      • Login to Blogger account with ID friend
      • In the Template Designer select Add Gadget
      • Click the plus sign [+] on the HTML / JavaScript
      • Copy-Paste the following code into it 
      <style type="text/css">
      div.TabView div.Tabs
      {Height: 30px; overflow: hidden}
      div.TabView div.Tabs a {float: left; display: block; width: 73px; / * Width of the Main Menu Top * /
      text-align: center; height: 30px; / * Height Main Menu Top * /
      padding-top: 5px; vertical-align: middle; border: 1px solid # FFF; / * Top Menu border color * /
      border-bottom-width: 0; text-decoration: none; font-size: 15px; font-family: "tekton Pro" / * Font Main Menu Top * /
      }
      div.TabView div.Tabs {background: # 95CAFF; color: # 000; border: 1px solid # FFF; text-decoration: none;}
      div.TabView div.Tabs a: hover {background: # 7CA9C0; color: # 00F; border: 1px solid # 00F; text-decoration: none;}
      div.TabView div.Tabs a.Active {border: 1px solid # 00F; background: # 00F; color: # FF0; font-style: normal; border: 1px solid # FFF; text-decoration: none; / * background color On the Main menu * /}
      div.TabView div.Pages {clear: both; border: 1px solid # FFF; / * Main Box border color * / overflow: hidden; background-color: # 95CAFF; / * background color of the Main Box * /}
      div.TabView div.Pages div.Page {height: 100%; padding: 0px; overflow: hidden}
      div.TabView div.Pages div.Page div.Pad {padding: 5px 5px}
      </ Style>
      <script type='text/javascript'>
      //<![ CDATA [
      tabview_aux function (TabViewId, id)
      {
      tabview var = document.getElementById (TabViewId);
      / / ----- ----- Tabs
      var Tabs = TabView.firstChild;
      while (Tabs.className! = "Tabs") Tabs = Tabs.nextSibling;
      var tabs = Tabs.firstChild;
      var i = 0;
      do
      {
      if (Tab.tagName == "A")
      {
      i + +;
      Tab.href = "javascript: tabview_switch ('" + TabViewId + "'," + i +");";
      Tab.className = (i == id)? "Active": "";
      Tab.blur ();
      }
      }
      while (Tab = Tab.nextSibling);
      / / ----- ----- Pages
      var Pages = TabView.firstChild;
      while (Pages.className! = 'Pages') Pages = Pages.nextSibling;
      var Page = Pages.firstChild;
      var i = 0;
      do
      {
      if (Page.className == 'Page')
      {
      i + +;
      if (Pages.offsetHeight) Page.style.height = (Pages.offsetHeight-2) + "px";
      Page.style.overflow = "auto";
      Page.style.display = (i == id)? 'Block': 'none';
      }
      }
      while (Page = Page.nextSibling);
      }
      / / ----- Functions ------------------------------------------ -------------------
      tabview_switch function (TabViewId, id) {tabview_aux (TabViewId, id);}
      tabview_initialize function (TabViewId) {tabview_aux (TabViewId, 1);}
      //]]>
      </ Script>
      <form action="tabview.html" method="get">
      <div id="TabView" class="TabView">
      <div style="width: 300px; "class="Tabs">
      <a>TITLE  -1 </ a>
       <a>TITLE -2 </ a>
      <a>TITLE  -3 </ a>
      <a>TITLE  -4 </ a>
      </ Div>
      <div style=" width:300px; height:300px; "class="Pages">
      <div class="Page">
      <div class="Pad">
      CONTENTS TITLE HERE -1
      </ Div>
      </ Div>
      <div class="Page">
      <div class="Pad">
      CONTENTS TITLE HERE -2
      </ Div>
      </ Div>
      <div class="Page">
      <div class="Pad">
      CONTENTS TITLE HERE -3
      </ Div>
      </ Div>
      <div class="Page">
      <div class="Pad">
      CONTENTS TITLE HERE -4
      </ Div> </ div> </ div> </ div> </ form> </ div> </ div> </ div>
      <script type="text/javascript">
      tabview_initialize ('tabview');
      </ Script>

      Have a friend replace the red text are:
      • Change text CONTENTS TITLE -1 s / d 4 HERE with what you want al show
      • Width: 300px; fit the width of the placement of this Menu Tab
      • Height: 300px; in accordance with the wishes of friends
      • Try the HTML code above noticed comrade with a width: 73px; with border: 1px; wore a very simple formula [width of the tab [300] - the number of border Tab [8]: Tabs [4]  example: 298 - {2 + 2 +2 +2}: 4 = 73
      Problems and solutions: 
      • Problem »Sometimes - sometimes all of the contents of Tab collector together in one Tab
      • The solution »Add </ div> between problematic under Title Contents

        0

        Place your ADS right beside Comment Box

        Now I will try to share with friends, according to title I gave the box beside Save Ad Sponsors comments why should there?
        the answer is very simple and very realistic, try the Blog Comments comrade comrades watch, lots of empty space on his right, right  :z  

        It's easy, still remember with my previous Creative Ways Links Advertise on Comment Box .Okay straight to how to make it:
        • Login to Blogger account with ID friend
        • In select Edit HTML Template Designer
        • Put a check beside Expand Widget Templates
        • Find <b:loop values='data:post.comments' var='comment'>
        • More or less like this: 
        <div expr:id='data:widget.instanceId + &quot;_comments-block-wrapper&quot;'>
        <dl expr:class='data:post.avatarIndentClass' id='comments-block'>
        <b:loop values='data:post.comments' var='comment'>
        • Copy-paste the following code above it,
        <table border='0' cellpadding='1' height='auto' width='800'>
        <tr><td valign='top'>
        <div style='width:480px;height:auto;padding:1px; align:left; border:0px solid #999'>

        • then more will be as follows:
        <table border='0' cellpadding='1' height='auto' width='800'>
        <tr><td valign='top'>
        <div style='width:480px;height:auto;padding:1px;align:left:border:0px solid #999'>
        <br/>
        <div expr:id='data:widget.instanceId + &quot;_comments-block-wrapper&quot;'>
                <dl expr:class='data:post.avatarIndentClass' id='comments-block'>
                  <b:loop values='data:post.comments' var='comment'>
        • width = '800' please adapted to the width of the blog postingsfriend
        • width = 480px; tailored to the reduction of the ad
        • subsequent search for the last <data:comment.body/>
        • More or less like the following:
        <span class='deleted-comment'><data:comment.body/></span>
        <b:else/>
        <p><data:comment.body/></p>
        </b:if>
        </dd>
        <dd class='comment-footer'>
        <span class='comment-timestamp'>
        <a expr:href='data:comment.url' title='comment permalink'>
        <data:comment.timestamp/>
        </a>
        <b:include data='comment' name='commentDeleteIcon'/>
        </span>
        </dd>
        </b:if>
        </b:loop>
        </dl>
        <b:if cond='data:post.commentPagingRequired'>
        <span class='paging-control-container'>
        • Then more will be as follows:
        <span class='deleted-comment'><data:comment.body/></span>
        <b:else/>
        <p><data:comment.body/></p>
        </b:if>
        </dd>
        <dd class='comment-footer'>
        <span class='comment-timestamp'>
        <a expr:href='data:comment.url' title='comment permalink'>
        <data:comment.timestamp/>
        </a>
        <b:include data='comment' name='commentDeleteIcon'/>
        </span>
        </dd>
        </b:if>
        </b:loop>
        </dl>

        </div> 

        </td><td valign='top'> 
        <div style='width:210px;height:auto;padding:5px; align:right;border:0px solid #F00;background:#FFF;'>
         SAVE SCRIPT ADS / BANNER HERE 
         <br/> 
         </div>
         </td></tr></table>

         </div><b:if cond='data:post.commentPagingRequired'>
        <span class='paging-control-container'>
        • Text in green is the additional code
        • Place an ad scripts on the red text
        • Save Template friends.


        0

        How to display the buttons share Blogspot

        Comrade Blogger surely all know Blogspot Share Buttons located below the left post, For the bloggers who take shelter in blogspot default template and use :i

        [Provided by Google Blogspot] is not a problem, because they live check the settings then the share buttons, well what about the fellow who wore Blogger Template Design?!

        Of course the share buttons will not appear, I will now try to share with friends how to create and display the share buttons on Blog comrades :z 

        To show how:
        • Login first on Blogger account with ID friend 
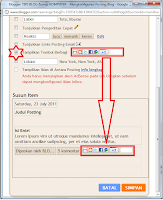
        • In Design / Designer Templates: Click on Edit the existing text in the bottom right on the Blog Post [Settings posts]
        • Find and check / check the radio buttons beside the left image share :r
        • Scroll to the bottom it is definitely a picture / image share buttons will be visible 
        • Save the template friend
        [For details Note The picture right]

        The next step:
        • In Design / Designer Templates select Edit HTML
        • Put a check beside Expand Widget Templates 
        • Find <!--quickedit pencil--> or search <div class='post-footer'> 
        Learn as follows:
        &lt;!-- quickedit pencil --&gt;
                &lt;b:include data='post' name='postQuickEdit'/&gt;
              &lt;/span&gt;   store here   &lt;/div&gt;
              &lt;div class='post-footer-line post-footer-line-2'&gt; 
        Copy and paste the following code in the text »  store here   «
        &lt;div class='post-share-buttons goog-inline-block'&gt;
                &lt;b:if cond='data:post.sharePostUrl'&gt;
                  &lt;b:include data='post' name='shareButtons'/&gt;
                &lt;/b:if&gt;
              &lt;/div&gt;
        • Save Template friend
        Meanwhile, if a friend wanted a place I'll look the other [eg below / above the title of the post] friends can try and be creative while learningcreative :y
        CONGRATULATIONS


        4

        Be Creative On Read More and Auto Hidden

        Talking about Blog will certainly not be separated with a name fragment, commonly called Readmore article or Read more,
        and is located on the left and on the right above the bottom of the blog posts that aim to cut / chop off the display on the Home page :#

        Now I will try to share with friends, how to move / create Read more / Read more about who is left to the right blog:

        Stage One:
        • Login to ID fellow Blogger Account
        • On the Dashboard - Design / Designer Templates select Edit HTML
        • Copy and paste the following code above ]]></ b: skin>
        .jump-link a{-moz-border-radius:5px;-khtml-border-radius: 5px;-webkit-border-radius: 5px;float:right;padding:2px 12px; border:none; background:#236c95; color:#FFF;font-style: normal;border:1px solid #0FF;margin-top:10px;text-decoration:none;}

        .more a:hover, .jump-link a:hover{background:#000;color:#FF0;border:1px solid #F00;text-decoration:none; }
        • Save Template friends and see the results [such as the image above]
        • Read more it is a form of text,
        • Comrade can change colors as you wish

        The second stage: 


        In accordance with Title I of this article, now let us show creativity together in order to appear Read more Auto Hidden [would look if we put the mouse on the Post article: z and will be lost when you slide the mouse] What, what friends are interested in : O

        Here's how:
        • Tick ​​/ check the radio beside Expand Widget Templates
        • Copy and paste the following code above ]]></ b: skin>
          .post .hidebego {
              display:none;
          }
          .post:hover .hidebego {
              display:inline;
              float:right;
          }
          • Next scroll down and Copy-paste following code below  <data:post.body/> or above <b:if cond='data:post.hasJumpLink'>
          <div class='hidebego'> 
          • Since the structure of different templates, and to avoid mistakes, simplenya Copas following code right above <b:if cond='data:post.hasJumpLink'> then more will be as follows:
          <div class='hidebego'>
          <b:if cond='data:post.hasJumpLink'>
                <div class='jump-link'>
          <a expr:href='data:post.url + &quot;#more&quot;'><data:post.jumpText/></a>
                </div>
              </b:if>
              </div>
          • Save Template Creation friend and it's done us on Read more


          0

          How to create link blog like Rainbow


          ink (Article Title, Label / Catagori) Blog comrades will change color like a Ferris (Rainbow) if the above link we put the cursor, for example: try a friend put the cursor on this blog links. :r
          With links such as the Rainbow will make a colorful fellow blog :z
          Maybe everyone already knows what a rainbow or a Ferris is an optical and meteorological phenomena in the form of multicolored light parallel to each other that looks at the sky or any other medium. In the sky, a rainbow appears as an arc light with a tip leads to the horizon at some time light rain. Rainbow also can be seen around the rushing waterfall. encyclopedia

          How to Create a Link Blog like Rainbow:
          1. Log in to Blogger with friend ID.
          2. On the Dashboard page, we select Layout.
          3. Then select Edit HTML
          4. Check the Expand Widget Templates
          5. Find the code:  
          6. Copy-Paste the following code, the code above the
          <script src='https://sites.google.com/site/tipsblogbegoku/arsip/rainbow.js'></script>
          7.  Save Template comrades if completed
          8. Try to see the result on Blog friend, how friends put the mouse over the link / title of the article must have the color of his writing changed - changed as the Rainbow


          0

          Komentar Blogger

          Label

          creation (9) Iklan (4) Komentar (8) Kreasi (14) link (1) slide (5) software (1) tips trick (9) tips trik (14) tutorial (8)

          Arsip Blog


          KREASI KOLOM - © Copyright 2012 - All rights reserved
          Powered by Blogger